Hello Everyone!
Today we will be building your base schedule! We will be taking the list that we created in our previous blog and using it to create an organized schedule. If you didn’t have a chance to read our previous blog, please do so before going any further into this blog. You can access the previous blog here!
If you have already read the last blog and created your list then you are in the right place!
Currently, you probably have a list of events that aren’t organized in any form or fashion. Our first order of business will be to make sure that each event is assigned a specific time. If any of the events that you have listed don’t occur at a specific time then they probably don’t fall under the category of nonnegotiable. Therefore, you can move them to your other list of commitments that we will come back to later in the process.
To make this process easier we have created a template to assist with the schedule creation. A PDF of this template will be included in our weekly newsletter which will be shared this Friday. Make sure to sign up here to receive our newsletters! The rest of this blog will show you how to create your base schedule utilizing this template.
1. Organize by Day and Time
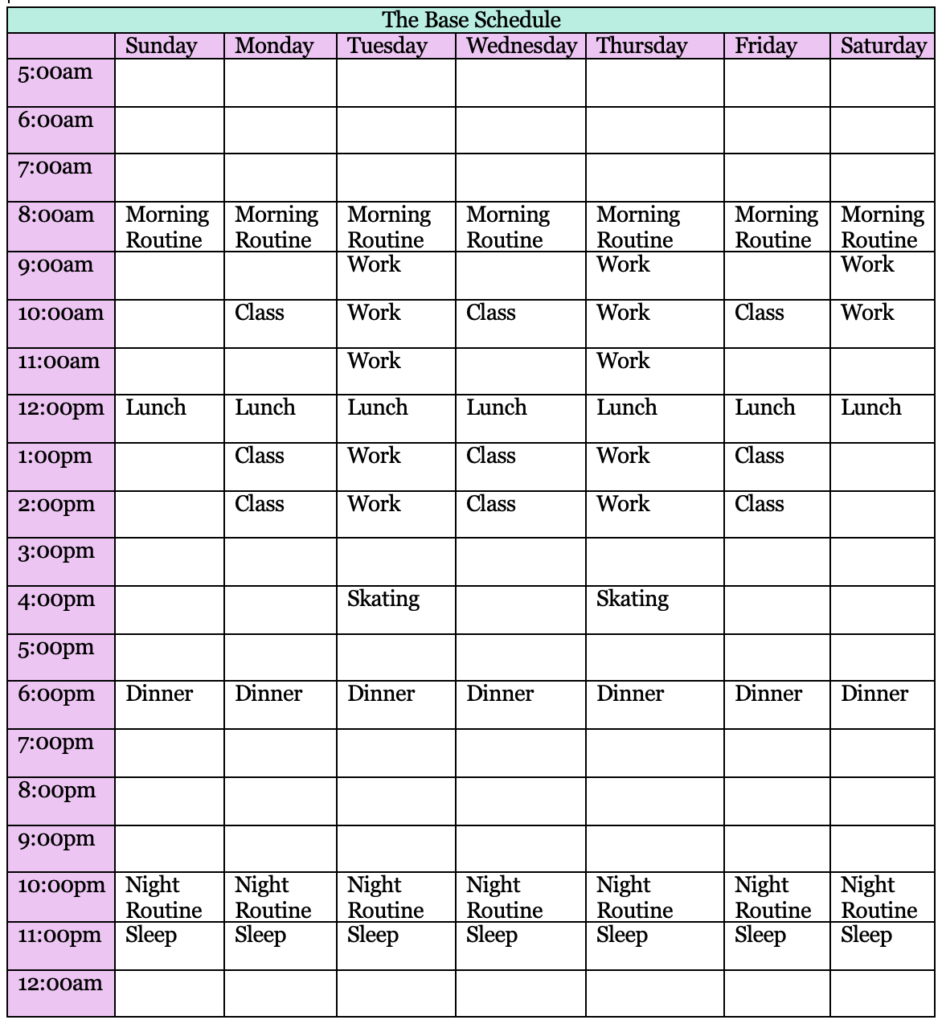
The first thing that you are going to do is enter all of your events into the chart. This easily organizes them by day and time.
2. Pick a color for each activity
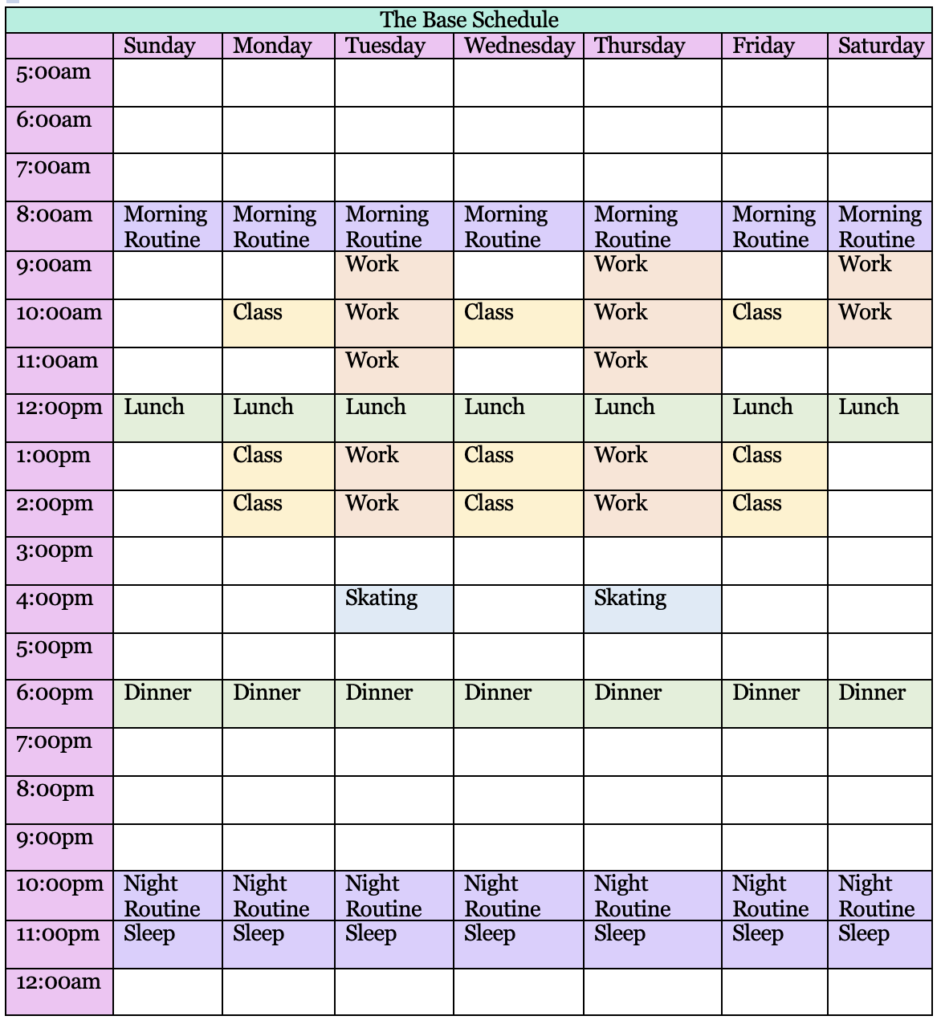
While this is by no means a required step it can be extremely helpful to color code your chart. Picking one color for each activity can make it much easier to see your tasks immediately and organize them. There are many ways that you can personalize your own chart, but personally I enjoy picking a different color for each activity. I will then utilize this color throughout the rest of my planning materials.
3. What if the event doesn’t occur on the hour?
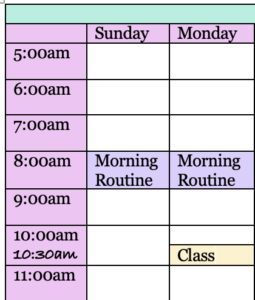
As you may have noticed above our template is hourly, but that doesn’t mean that you don’t have a weekly class at 10:30am. For situations like this, when the event doesn’t land directly on the hour, I like to do one of two things. I will either write in the time in the far-left column under the hour or I will just put the time next to the event in parenthesis. This keeps the chart organized while still indicating what time I need to attend the event.
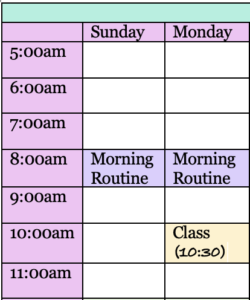
4. Congratulations! You have created your base schedule!
You did it! Well done! You now have a base schedule that will be extremely important to hold on to for the next few weeks of content. Next week, we will be going over those blank boxes in your schedule and some of the best ways to utilize them to make them more productive.
See you next time!
Maria
P.S. Don’t forget to follow us on social media Facebook | Instagram | Pinterest

